Installing Custom Recovery to your device is a necessary step towards customization or installing custom Roms and TWRP Recovery is the most popular recovery ever (also recommended by many developers before flashing any Rom). You will need a custom recovery and unlocked bootloader before you make any changes in your device system. Now, you know the importance of a custom recovery or TWRP recovery so let's begin -

Disclaimer: Rooting or Installing TWRP Recovery may void your phone's warranty and may also brick your device. So, follow the instructions carefully to avoid any such issues. This guide is for only Redmi Note 4 (mido) users, please don't try it on any other device.
Guide on how to install TWRP Recovery on Redmi Note 4 (mido) -
Download all the required files on your PC -
TWRP Recovery
ADB Folder
lazyFlasher
1. Make sure your device have Bootloader unlocked.
2. Enable USB debugging -
- Go to Settings -> About Phone -> Tap 7 times on MIUI Version to enable Developer options.
- Now go to Settings -> Additional settings -> Developer options -> Enable USB debugging.
3. Copy the laziflasher zip into your device internal memory.
4. Now Boot your device into Fastboot mode. To do so,- Switch off your device.
- Press and hold Power button and volume down button simultaneously until the fastboot logo appears.
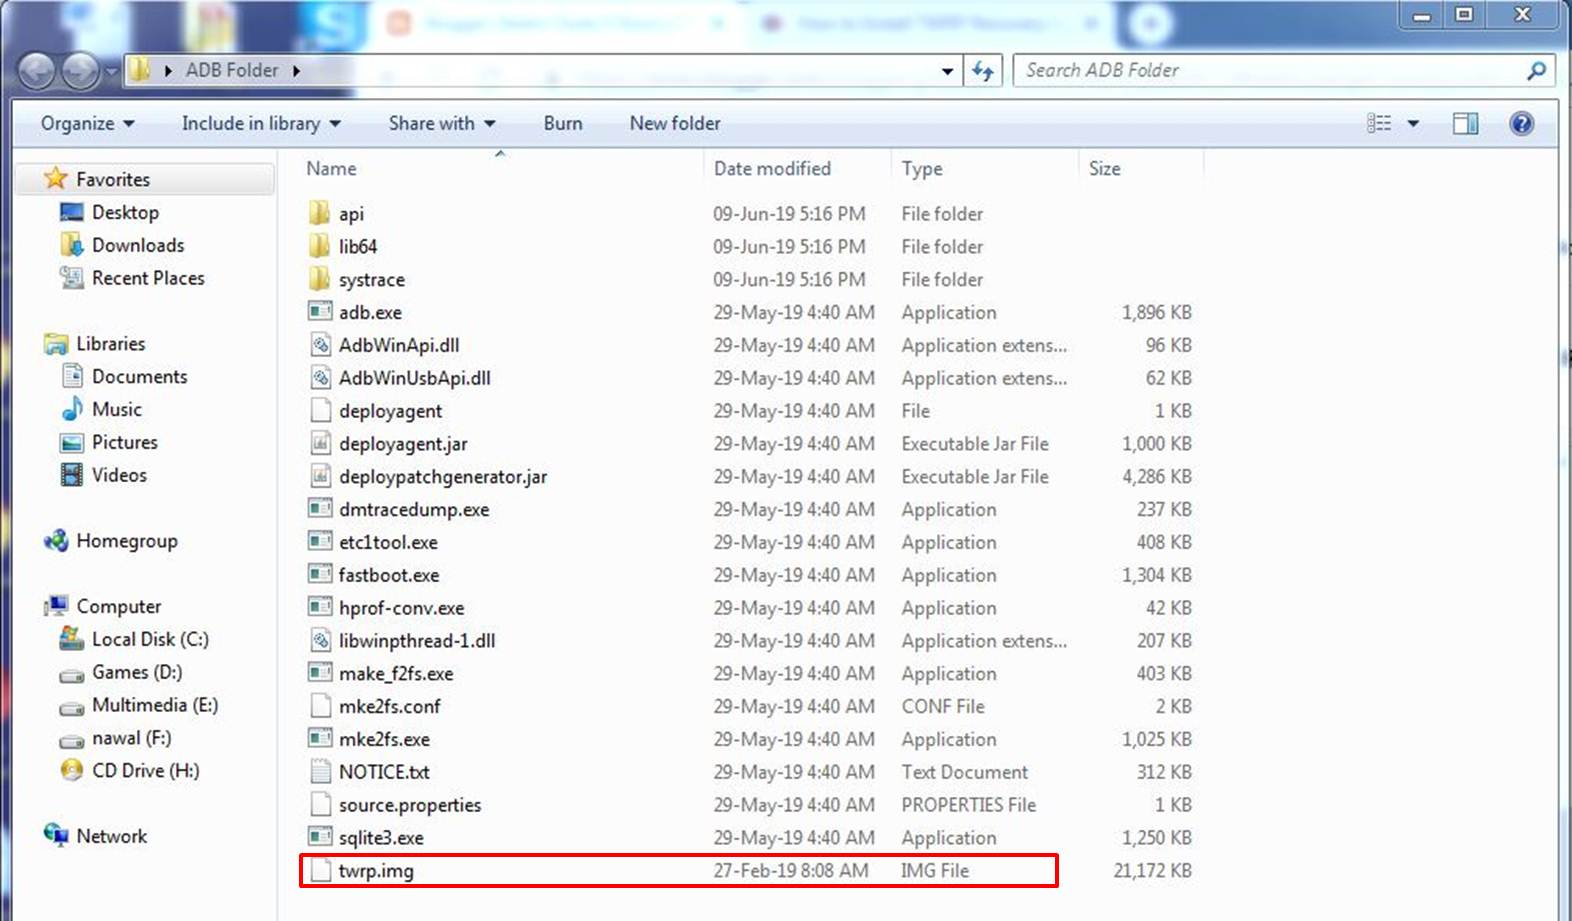
6. Once you have downloaded ADB folder on your PC, extract it anywhere and open the folder.
7. Download and Copy the TWRP Recovery file into the ADB Folder and rename it to twrp.

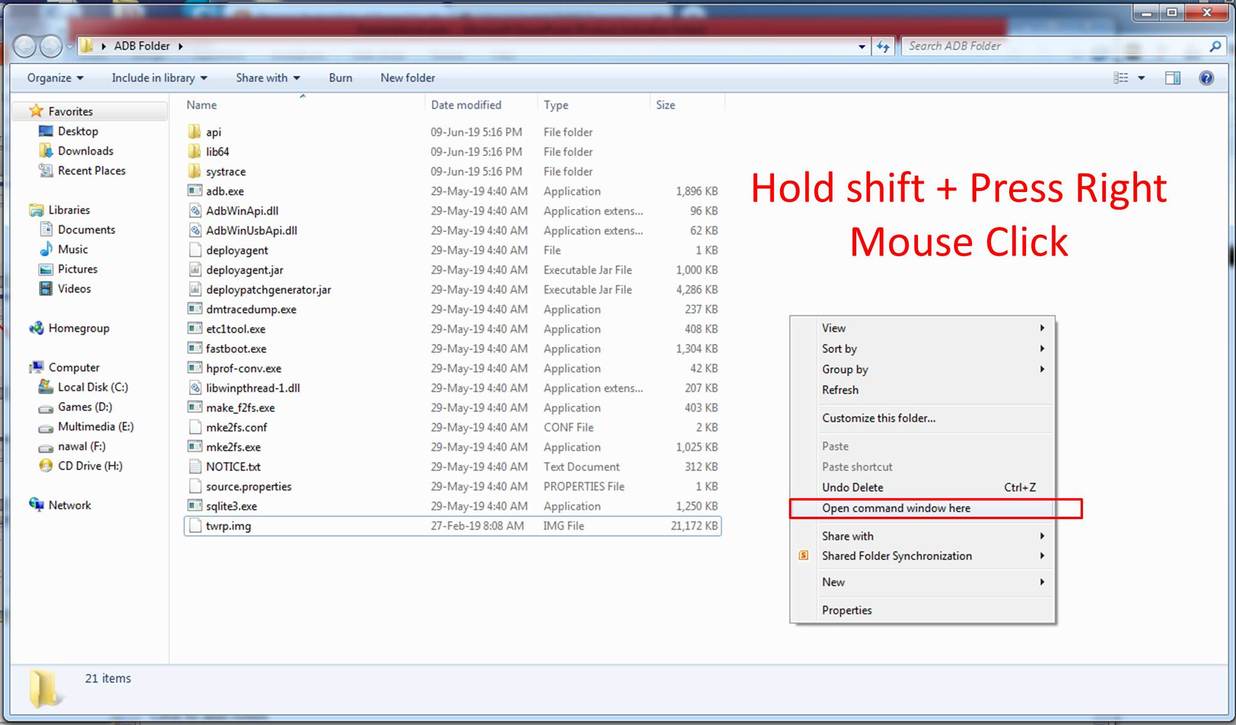
8. In the ADB Folder, hold shift key on your keyboard and press Right Click anywhere in the white space. You will see an option open command window here, click on it.

9. Now, Command Prompt will be opened. To check whether your device is successfully connected or not, type the following command and then press enter key-
fastboot devices

10. When it shows something like this, that means your device is connected.

11. Now, type the following command and then press enter key-
fastboot flash recovery twrp.img

Note: Make sure you have renamed the file from twrp-3.x.x-x-mido to twrp.
12. If it shows no errors that means twrp recovery has been successfully installed. In case of any error, please check you have followed the instructions carefully.

Note: Don't Reboot your device now.
13. Now, Boot your device into TWRP recovery -
- Press and hold Power button and volume up button simultaneously until the mi logo appears.
14. In TWRP Recovery, select install -> choose lazyflasher zip file -> swipe to install.
15. Go back, select reboot -> system. Now your device will reboot.
Congratulations, you have successfully installed TWRP Recovery on your Redmi Note 4. If you want to root your device then please go to "how to root Redmi Note 4" section.


